
Generate Searchable PDFs using Docker and Azure in 15 minutes
The Problem
Recently at EarthClassMail we wanted to migrate our “PDF generator” system to Azure, so I began researching our options. There are plenty of solutions out there that create PDFs from images, but we also needed OCR results to make the PDF “searchable”. I figured we’d be able to locate a .Net library that would do the trick. Or possibly an affordable service that offered a cloud-based API to generate PDFs…
Boy was I wrong! After browsing a multitude of possible solutions, I classified them into 3 groups:
- Too simple - mainly because they didn’t include the OCR/searchable part.
- Too old - utilizing DllInclude and COM Interops that I didn’t want to attempt in Azure.
- Too expensive - there were some that appeared to give us what we need, but they demanded an arm, a leg, and a pound of flesh to use.
I began to lose hope…then I expanded my google search to “non .Net” solutions.
Enter OCRmyPDF!
OCRmyPDF and Tesseract
Unbeknownst to me during all my fruitless searching, there are some really awesome open source libraries that had all we needed, with a catch - they don’t run on .Net!
OCRmyPDF jumped out at me with quality documentation, and a simple setup (via Docker). It consisted of the following:
- Docker image based on Ubuntu (a popular flavor of Linux)
- The image contained Tesseract, a powerful OCR library.
- A Python wrapper allowing easy invocation of Tesseract from the command line.
I knew a little about Docker, and less about Python, but was intrigued. Could I solve this problem with open source and Docker? After a little more searching, I found another library (OCRmyPDF-web) where a brave soul had wrapped the above in a simple REST layer (and even more simple front end). With a little hacking, I could basically host my own PDF-generating service! But how to “expose” this within Azure?
 Seeing far on shoulders of giants
Docker In Azure
Turns out, the answer is “easily”. The development process consisted of a few steps:
- Get the code working locally (using Docker).
- Follow these instructions to host your container within an Azure Web App.
While there was some elbow grease required to work through the exercise (learning python on the fly, working through errors, etc), it was mostly straightforward (and frankly, a little amazing after all my fruitless research into available .Net solutions).
Here are the details:
Speediest PDF
I created the SpeediestPDF repo to demo the python script I cobbled together (say “Speediest PDF” a few times out loud to yourself. I’m pretty proud of this rhyming name). Pull it and take a look around some of the files:
- Dockerfile - used to build the Docker image
- entrypoint.sh - launches the Docker container
- requirements.txt - list of libraries needed to run python script
- server.py - actual python code that establishes the REST API
Build it:
docker build -t martyice/speediestpdf .
Fire it up with something like this:
docker run -e azureAccountName=<AzureStorageName> -e azureAccountKey=<AzureStorageKey> -e appInsightsTelemetryKey=<AppInsightsKey> -p 8888:8000 martyice/speediestpdf
Once it’s running successfully, you can use the wonderful Postman to test it out:
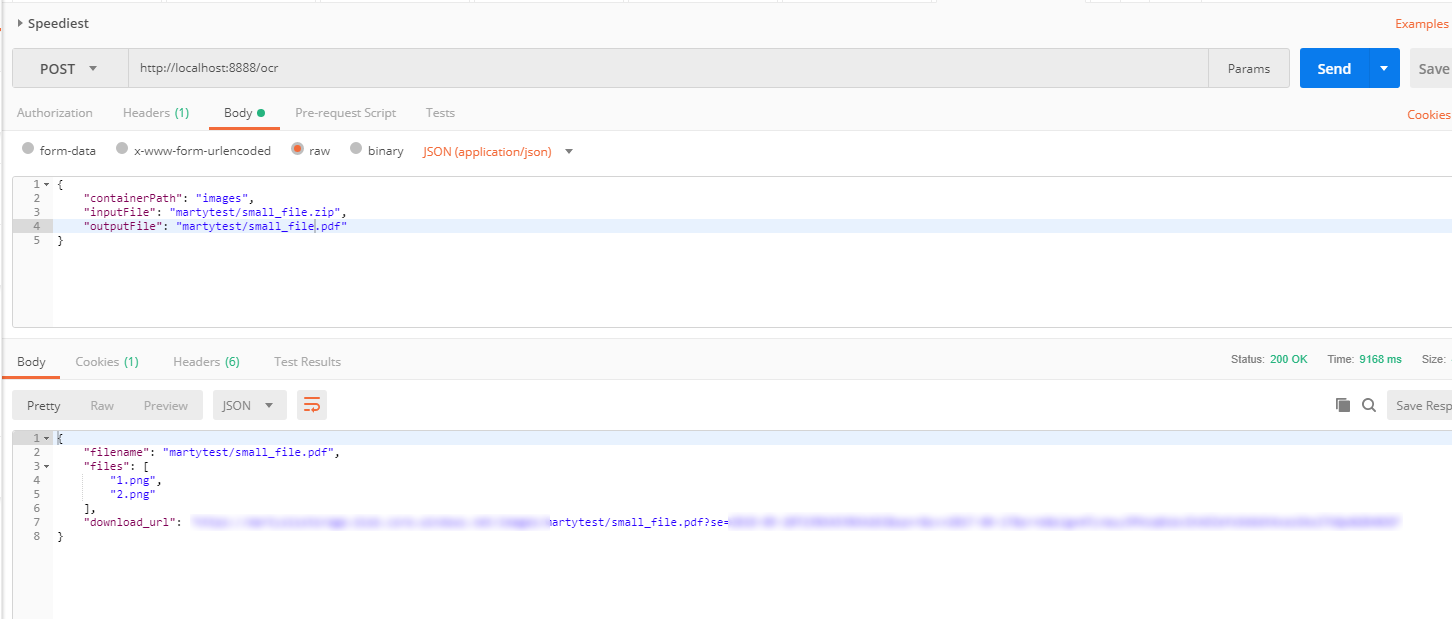 Wait a Minute Mr. Postman!
Docker Pro Tips
As I hacked throught this solution, I discovered some things about Docker that improved my development experience. I’m sharing them here in case they help you:
- You don’t need to name your container. I started out using the “–name” option when I’d run my container, but it caused issues if I wanted to run multiple times (eg, “the container name “/test” is already in use by container…”). If you’re just testing this stuff locally, you don’t need the name.
- To stop and remove all running containers, run this super handy set of commands:
- docker stop $(docker ps -aq)
- docker rm $(docker ps -aq)
- docker rmi $(docker images -q) note - this one is more invasive!
There’s a whole world of things to learn with Docker, but these commands drastically sped up my iterations, and eliminated alot of frustration.
Push to Azure
Once your satisfied with how it works locally, time to take your act on the road! The instructions for pushing to Azure are easy to follow. They utilize DockerHub, which is much like Github, except instead of storing source code, it stores, versions, and shares Docker images. Eventually you might want to put your top secret, masterfully crafted Docker image in a private repository (in DockerHub, Azure, or elsewhere), but for this exercise, we just need it publicly accessible. These instructions walk you through it.
- Tag your Docker image:
docker tag <imageIdentifier> <yourDockerHubUserName>/speediestpdf:demo - Push the Docker image to DockerHub:
docker push <yourDockerHubUserName>/speediestpdf -
Use AzureCLI to login to your Azure account.
- Create a resource group:
az group create --name MySpeediestPDF --location "westus2" - Create Linux service plan:
az appservice plan create --name MySpeediestPDF --resource-group MySpeediestPDF --sku B1 --is-linux - Create a web app. Note the “deployment-container-image-name” argument - this instructs Azure to pull down the Docker image you stored in Docker Hub earlier, and use it in the web app. Cool stuff!
az webapp create --resource-group MySpeediestPDF --plan MySpeediestPDF --name MySpeediestPDF --deployment-container-image-name <yourDockerHubUserName>/speediestpdf:demonote your “app_name” value will actually be publicly accessible from Azure, so you’ll need something unique. “test” probably won’t make the grade.
- IMPORTANT - Configuration Environment variables. I missed this step the first time through. It’s necessary to expose your Docker image’s port to the Azure web service port:
az webapp config appsettings set --resource-group MySpeediestPDF --name <app_name> --settings WEBSITES_PORT=8000You’ll also need to set values for the following variables (these are environment variables within the python script):
- azureAccountName
- azureAccountKey
- appInsightsTelemetryKey
- With all this in place…SUCCESS!
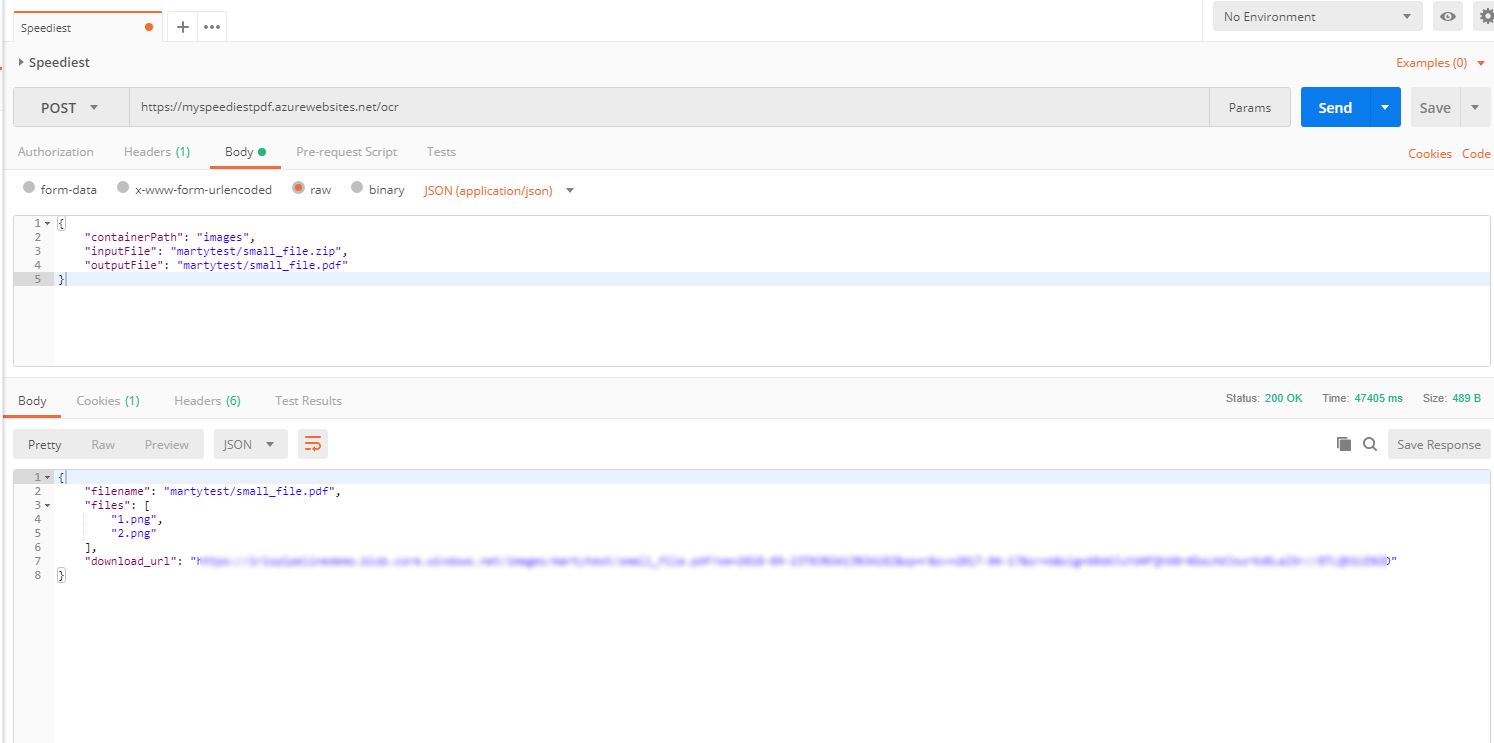 Success!
Debugging and Tracing
There are a few places to look when things don’t work correctly…
- Container Settings - within Azure Portal, you can view the logs generated when starting your container in the “Container Settings” section of your app service:
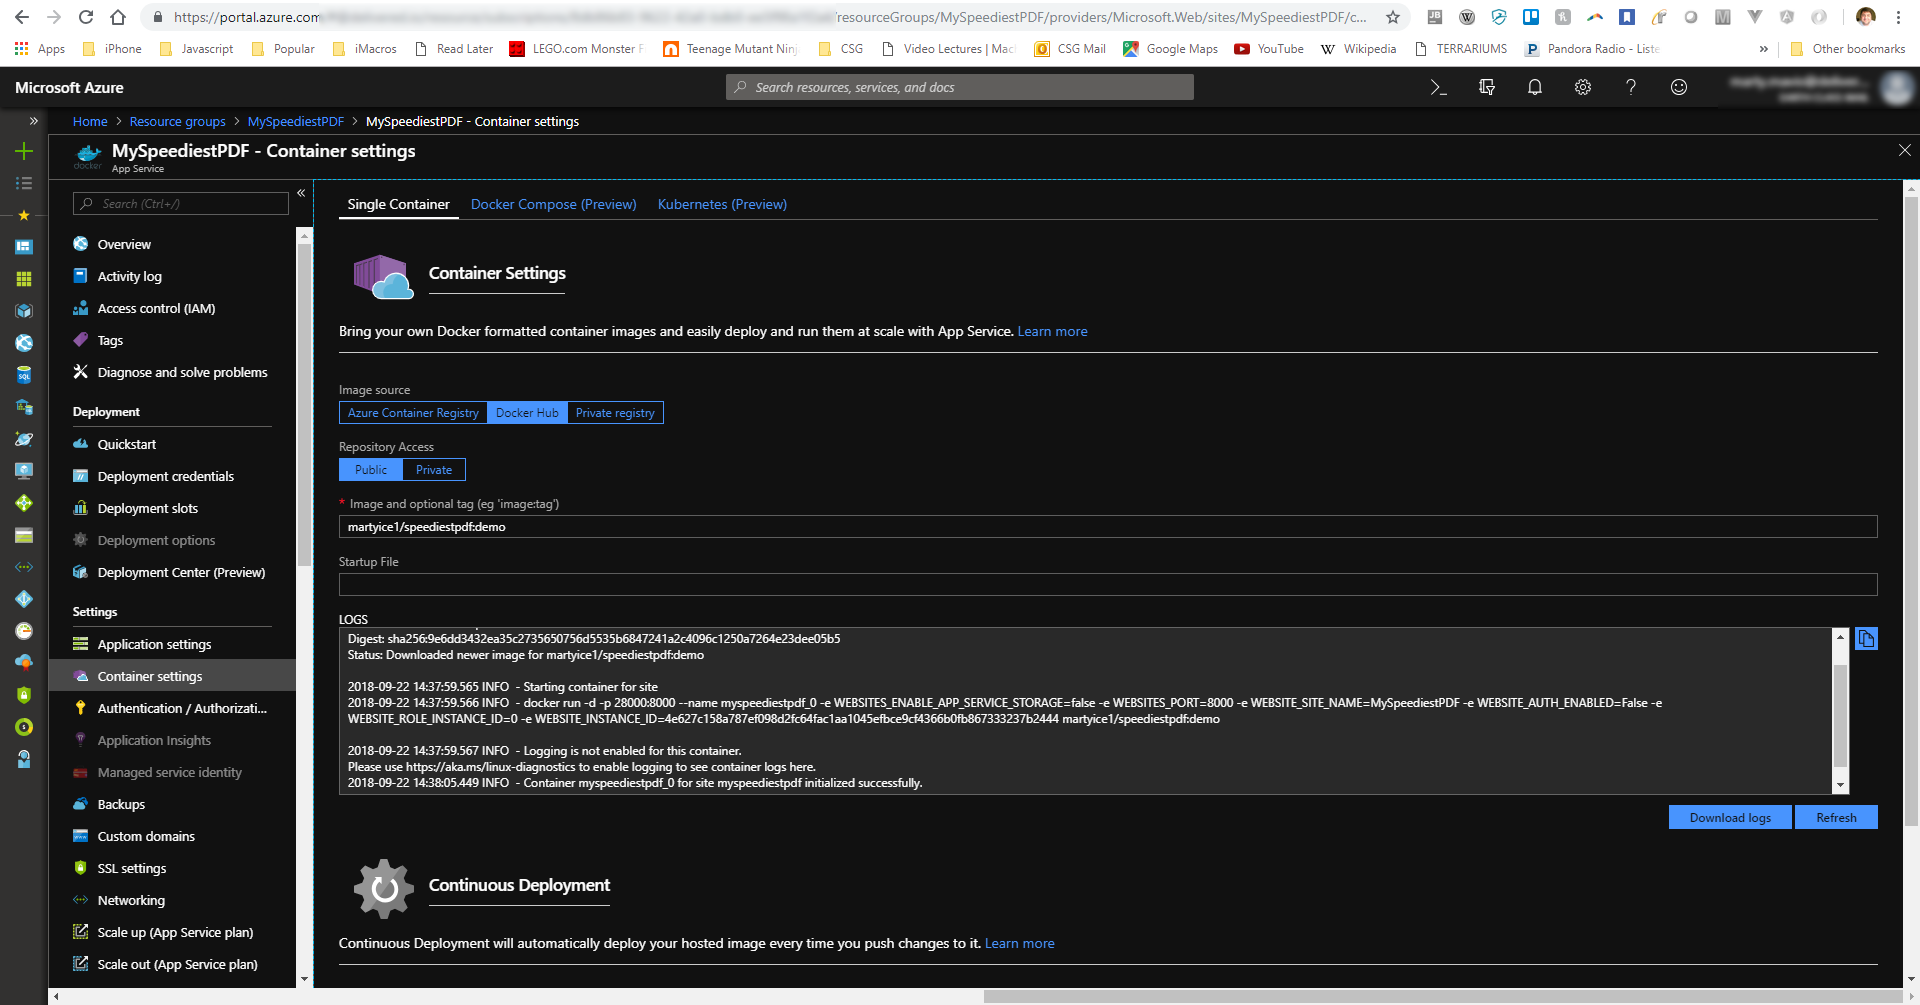 Helpful Container settings
- App Insights - as always, Azure App Insights can shed light on what’s happening within your Docker container. If you examine the Python source code in this exercise, you’ll see it’s logging helpful information to App Insights. Search the Traces and Exceptions logs to gain insight into what your python script is up to.
Disclaimer
It’s worth noting that this solution is a step towards a production ready solution, but is probably not recommended for actual production use. Some things to consider:
- Hug is a great development library for enabling REST in a Python application, but is not really intended for production volume. There are details in the Hug documentation on what to change and use when you’re ready for that.
- Security, security, security - there is currently none. Unwise for production, otherwise your service will attract the attention of baddies.
- Scalability - this example is single threaded, and not tuned in any way. If you need to support volume, you’d want to invest time and attention to that.
Ultimately, we ended up using a variant of this solution at EarthClassMail, one that launched “batch processing” Docker containers on the fly to respond to requests. It was a barrel of fun to work on, but that’s for another post.
Happy Docker/Python/Azure/PDF-ing!